This project was completed on April 30th. That was the date that I presented this senior project to the students and faculty at NSU (Northeastern State University) in Tahlequah, OK. This post will serve as an overview of the software design and wrap up for this project.
 GUI design demonstration
Above is the GUI itself in action. (Remember, all of the code can be accessed here.) This piece of software served as a link between the laptop and robot. It was used to control movement by providing a method to start and stop, as well as speed controls. In addition to these functions, the GUI displays important information about the status of the robot. Battery status, link time, and sensor reports are shown textually and graphically for better UI.
Here’s an overview of the interactions between the pieces of software.
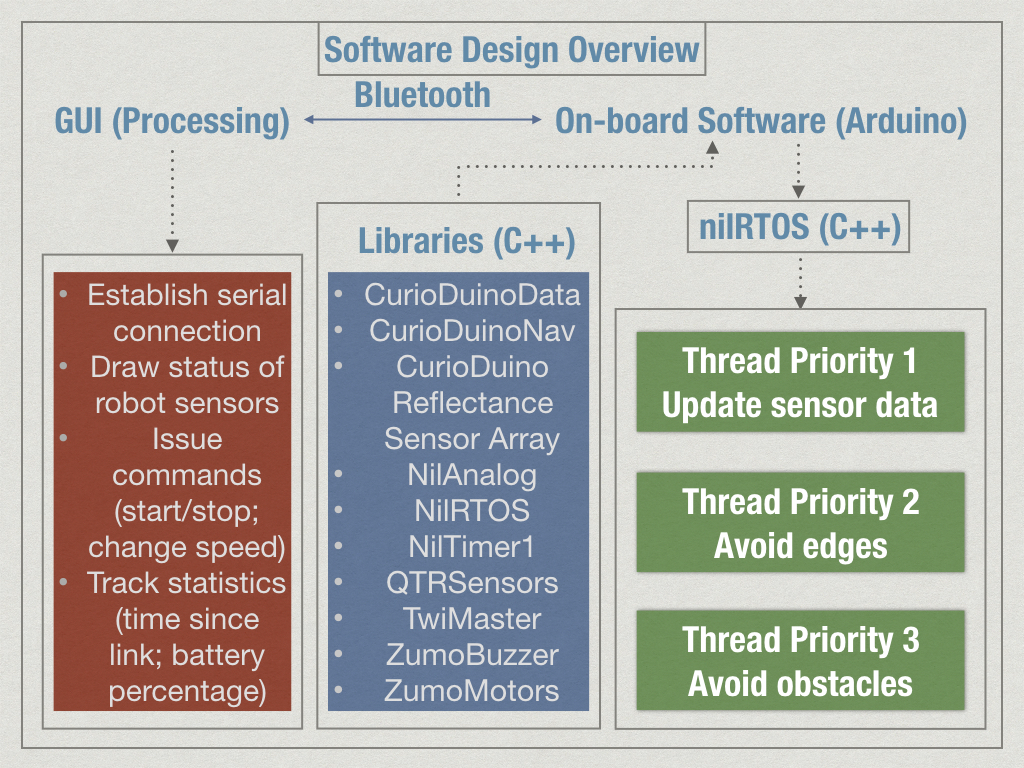 Software design overview
This graphic details how the software communicates and achieves the goals of the robot. A very interesting aspect of this project was that the nilRTOS use resulted in a 10-fold decrease in worst-case time-since-link. By carefully scheduling and prioritizing the threads, the robot was extremely quick to respond to objects, edges, and commands.
I certainly learned a lot from this project. When I began it, I knew nothing about Arduino, Real-time operating systems, Processing, or robotics. I was able to learn how to solder, read sensors, and integrate this all into a platform that communicated over bluetooth. This project truly serves the purpose of this blog. Learning more about science through coding and creating projects. I hope to complete many more projects like this one.
Thank you so much for following along for this project.